How to draw anime step by step
How do you draw a anime character?
Draw it in 9 steps, in about 50 minutes, with HB pencil, 2B pencil, kneaded eraser, drawing paper. Level: Intermediate.
- Steps
- 9
- Time
- 50 min
- You need
- HB pencil, 2B pencil, kneaded eraser, drawing paper
- Level
- Intermediate
This is a free drawing in the Guidart app.
An anime character starts with a circle and a few guidelines. You will place the eyes, nose and mouth with a cross, add spiky hair, and finish with soft shading and sparkling eyes.
Step-by-step instructions
Step 1
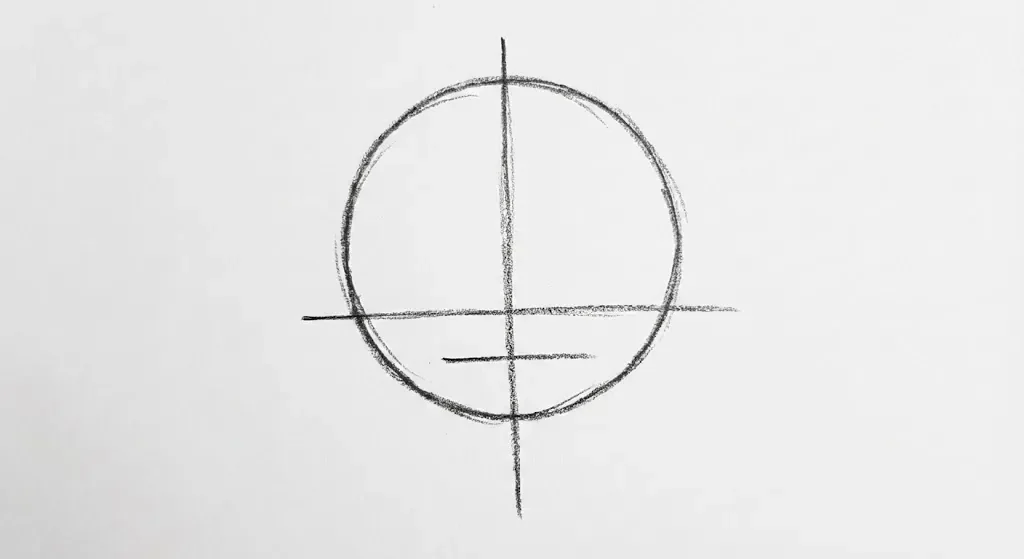
Start by drawing a circle for the upper part of the head. Add a vertical line down the center to help with symmetry. Then, draw two horizontal lines: one for the eyes and a shorter one below it for the mouth.
Step 2
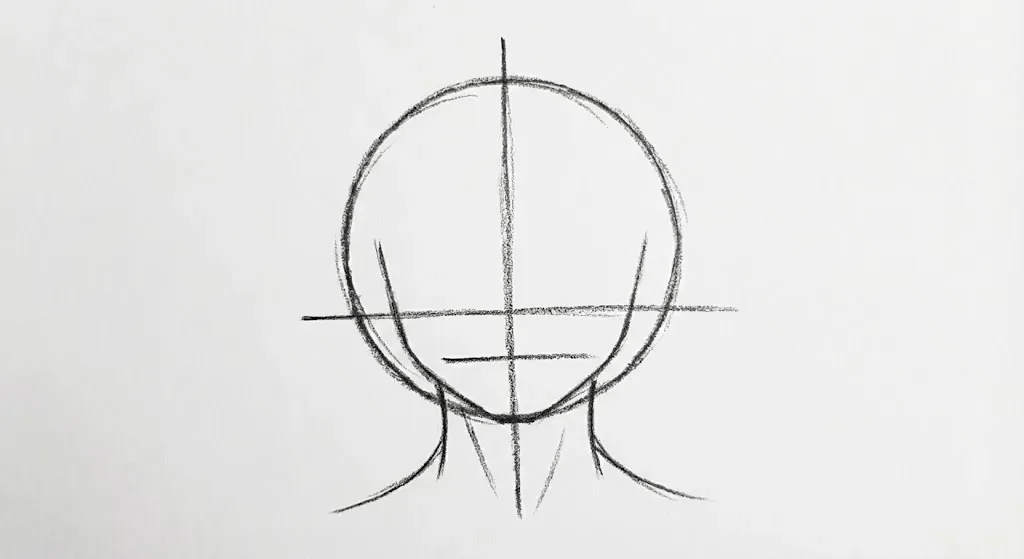
From the sides of the circle, draw two curved lines down to meet at a point on the central vertical line, forming the chin and jaw. Below the jaw, add two lines for the neck and curve them outwards for the shoulders.
Step 3
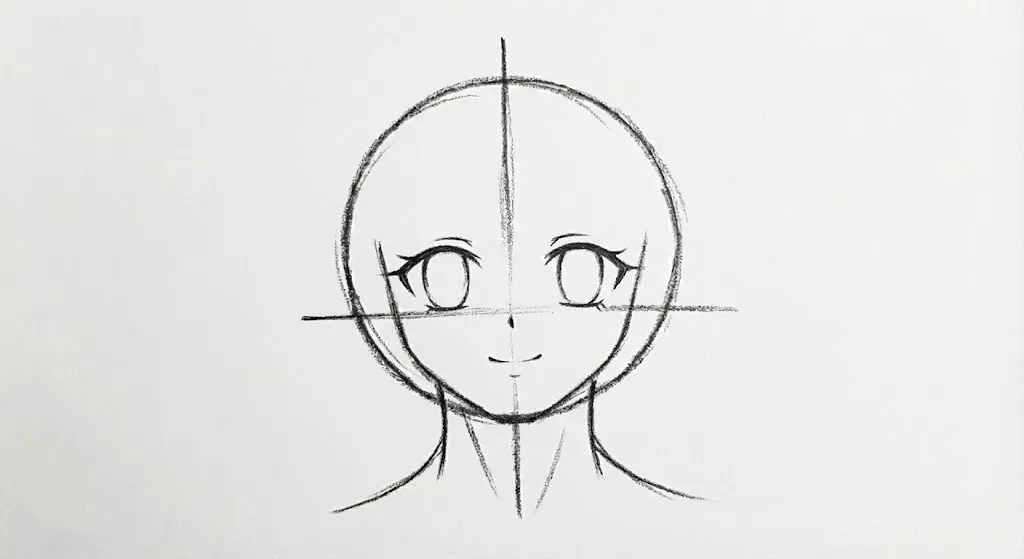
Using the guidelines, draw two large, expressive eyes on the upper horizontal line. Place a small dot or short line for the nose on the vertical line, and a simple curved line for the mouth below it.
Step 4
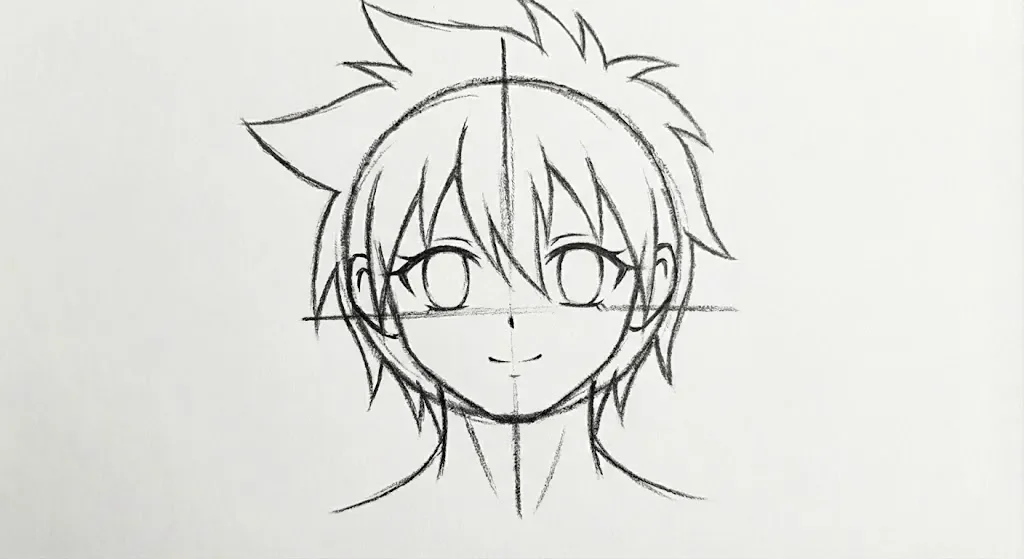
Sketch a simple spiky hairstyle around the head. Add small ears on the sides of the head, roughly aligned with the eyes. This completes the basic outline of your character.
Step 5
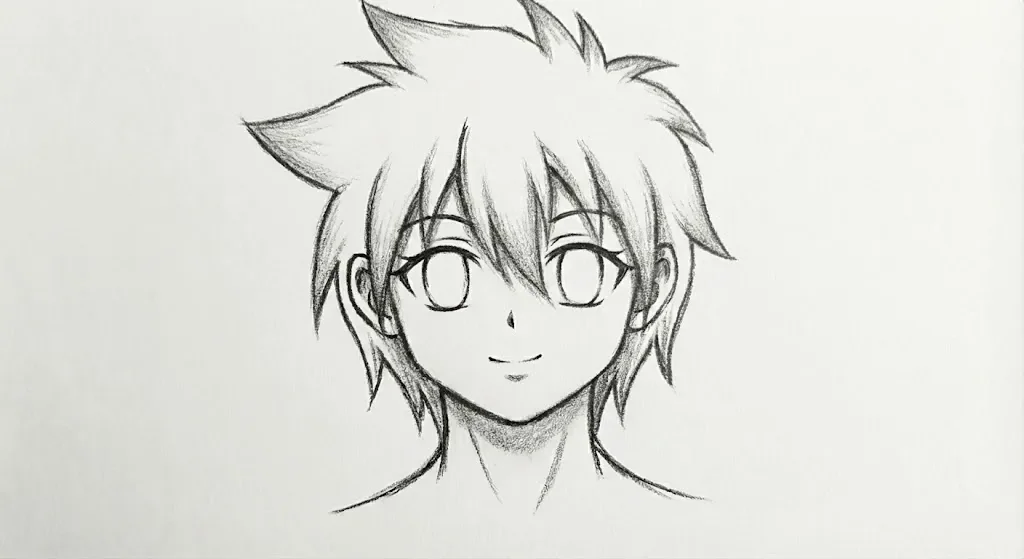
Lightly shade the tips of the hair spikes and the area under the hair fringe to create volume. Add soft shadows under the chin and on the neck.
Step 6
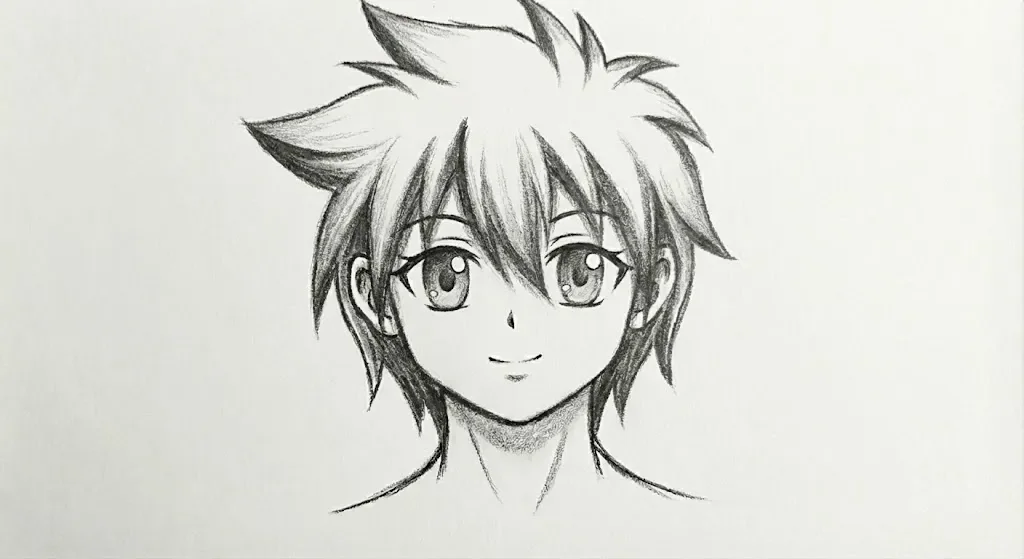
Add more definition to the hair by shading deeper within the spikes. Shade the irises of the eyes with a medium tone, leaving a small white circle in each for a highlight.
Step 7
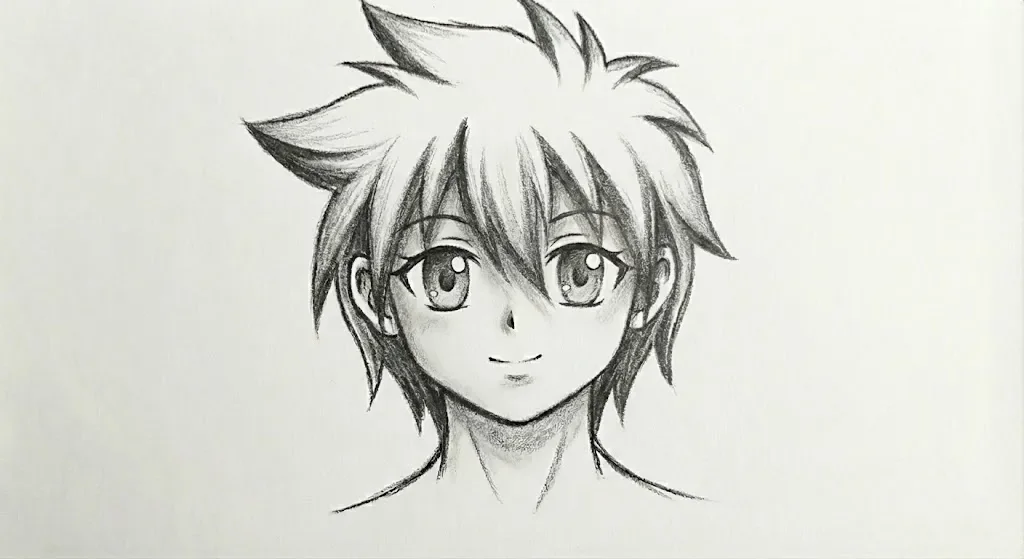
Add soft, light shadows to the face to create more dimension. Place them under the hair fringe on the forehead, around the eyes, and slightly on the cheeks.
Step 8
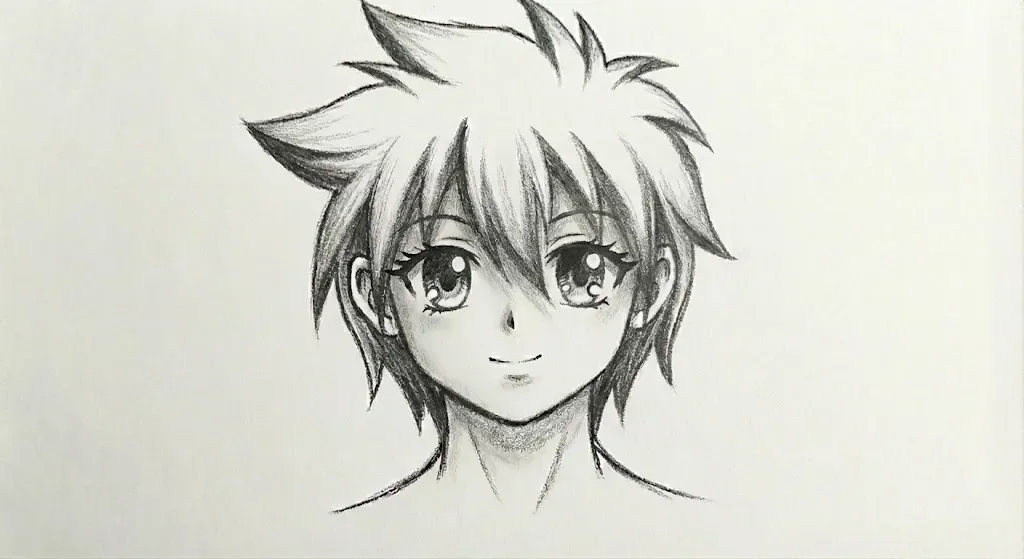
Darken the pupils of the eyes and add a second, smaller highlight next to the original one. Thicken and define the eyelashes for a more expressive look.
Step 9
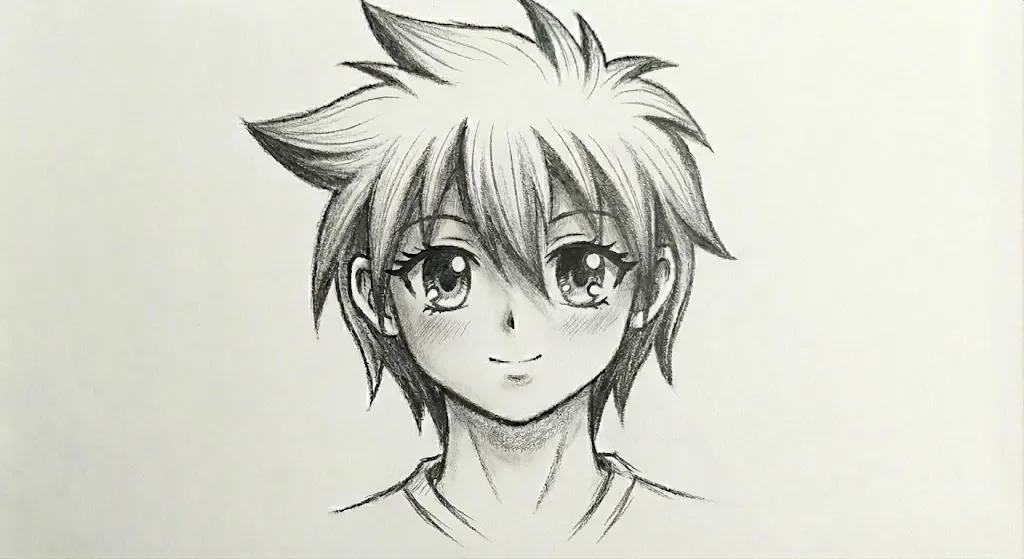
Add fine lines to the hair to suggest individual strands. Create a subtle blush on the cheeks using light cross-hatching. Finally, add a few lines on the neck to suggest the collar of a shirt. Your anime character is complete!
Tips for a better drawing
- Draw the vertical line and two horizontals in step 1, with the eye line across the middle of the head.
- Draw the jaw from the sides of the circle to a point on the center line in step 2.
- Place the large eyes on the eye line in step 3, and keep them the same size and height.
- Add spiky hair and ears in step 4, with the ears at the eye line.
- Leave a small white circle in each iris in step 6 and add a second smaller highlight in step 8.
Common mistakes and how to fix them
- The eyes are different sizes. Check against the center line.
- The ears are too high. Align them with the eyes.
- The shading is heavy. Keep it soft.
Print all steps on one sheet
Every step image and its instruction on a single Letter page, ready to keep next to your paper.
Printable coloring page
The line version of this drawing, printed in black and white so you can color it in yourself.
Drawings to try
Frequently asked questions
How do I draw the face so both eyes line up?
Use the horizontal eye line from step 1 and place both eyes on it in step 3. Check the ears in step 4 too, since they should sit roughly at the same level. If they still look uneven, compare them to the vertical centre line, which should sit halfway between them.
How do I draw anime eyes?
Draw large eyes with a dark pupil and leave a white highlight.
How do I draw anime hair?
Use spiky clumps and add fine lines for strands.